Leaving Website Disclosure

This link will redirect you to a site that may have certain associated risks, including not being insured by federal deposit insurance.

To remain at our site, click BACK. To leave our site for the link you selected, click PROCEED.

Direct Connect For QuickBooks (Windows)

Direct Connect For QuickBooks (Windows)


Connect With Us

We’ll help you set up Direct Connect for QuickBooks on your Windows computer.

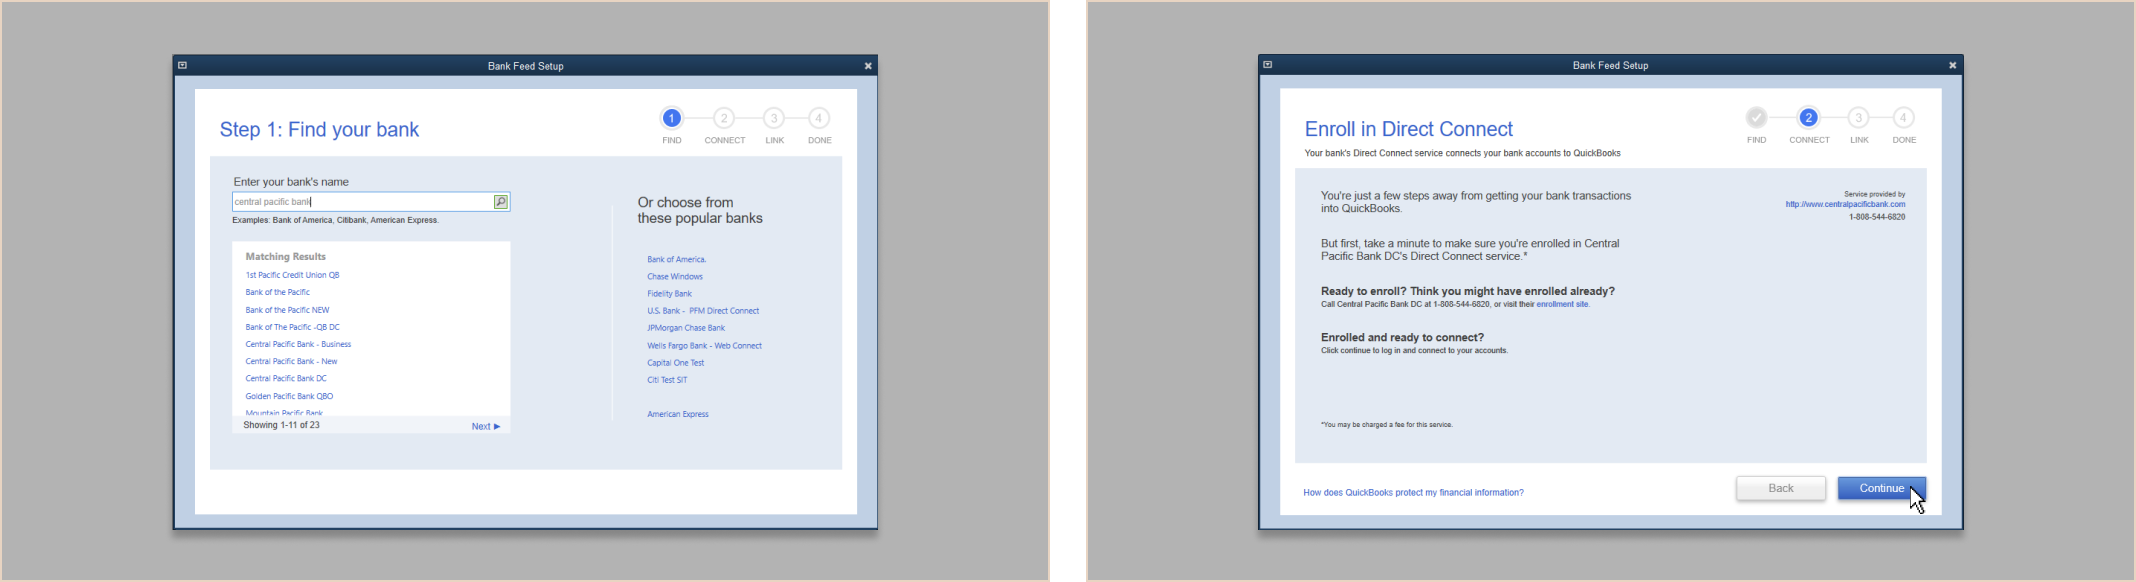
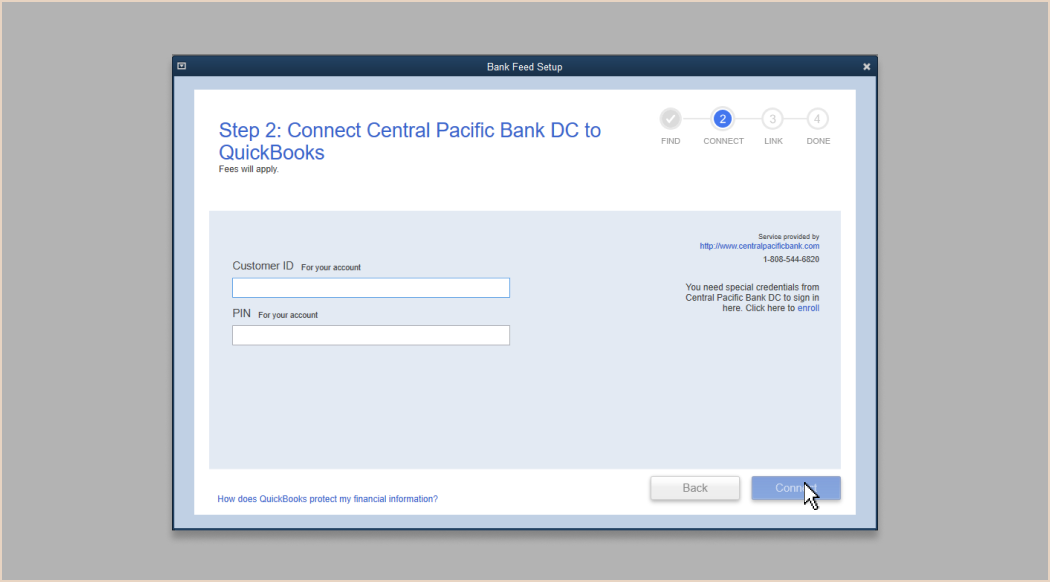
If your CPB account was connected to your QuickBooks program before 12/9/22, you’re using Web Connect (WC). The following steps will guide you through the process of switching to Direct Connect (DC). If you’re connecting your CPB account(s) to QuickBooks for the first time, please skip to Central Pacific Bank DC.

Have questions about the differences between Web and Direct Connect? Check out our FAQ.

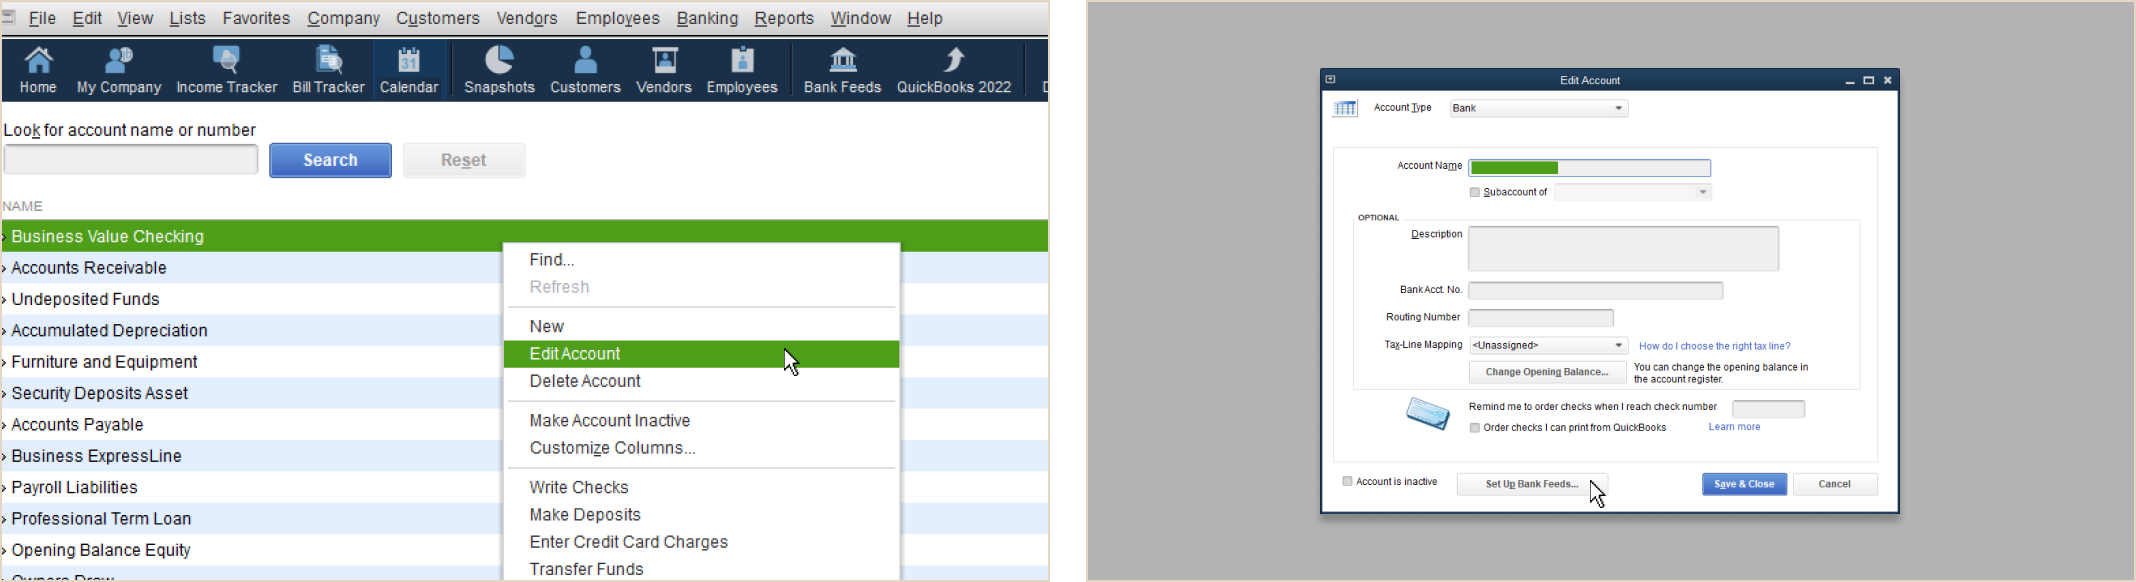
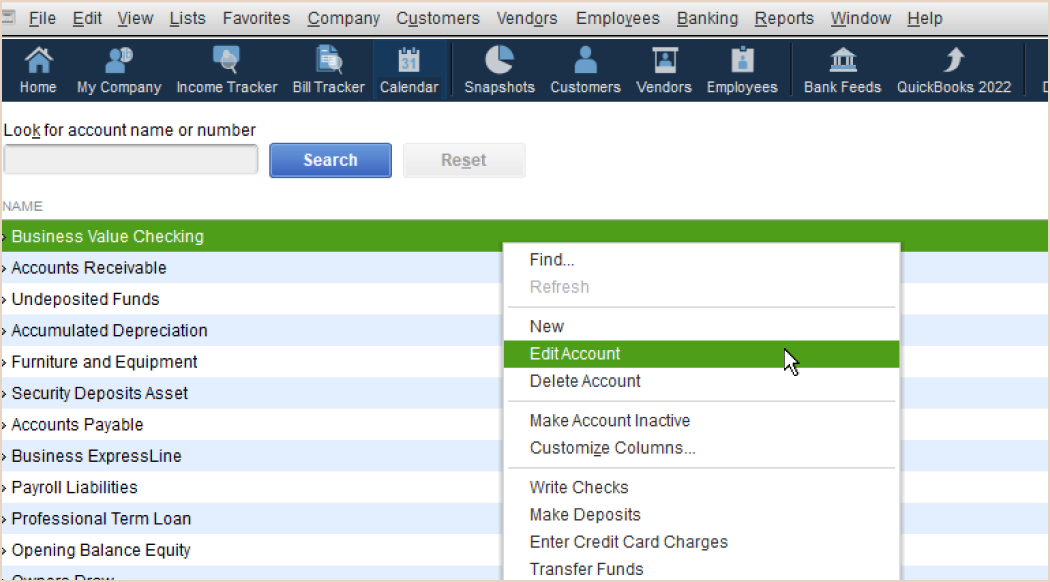
Go to Lists in the top menu, then Chart of Accounts.


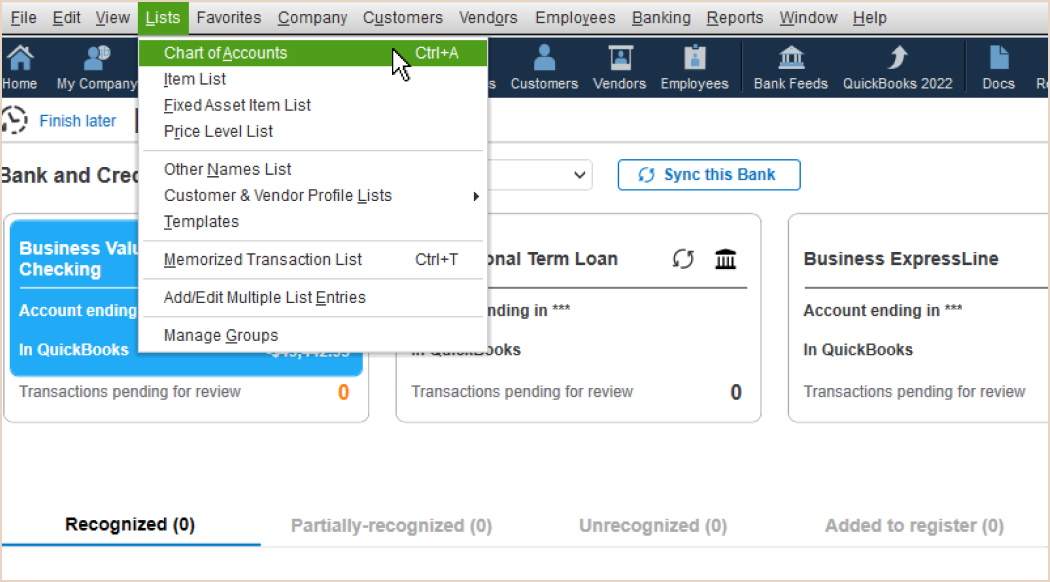
Right-click the account you want to deactivate, then choose Edit Account. Connected accounts will have a lightning bolt next to them.


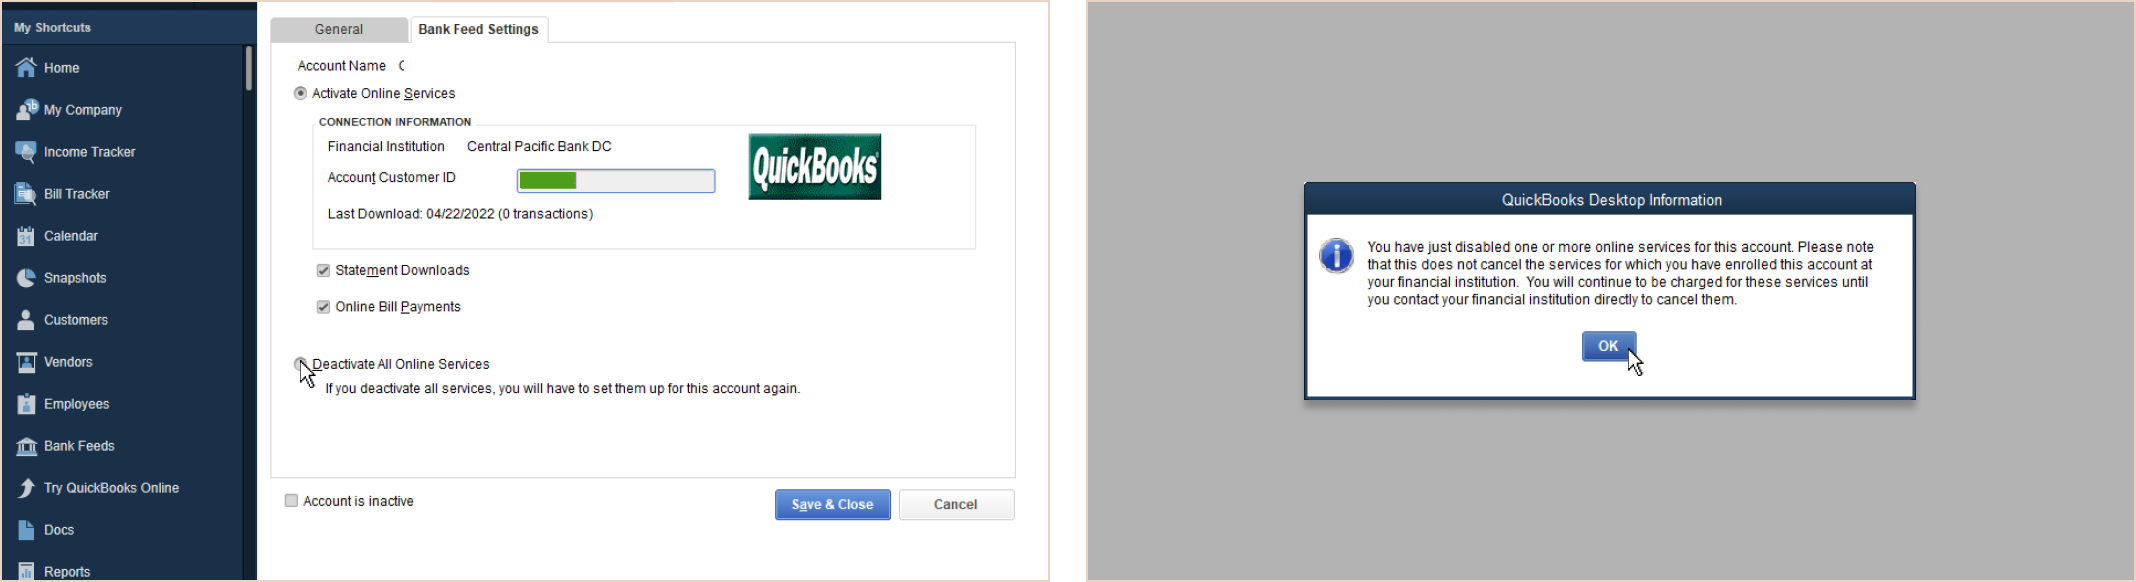
Go to the Bank Settings tab. Press Deactivate all online services and then OK to confirm. Hit Save & Close.


At your Chart of Accounts, right click on the account you just deactivated and press Edit Account. At the bottom of the window, press Set Up Bank Feeds and then press Yes.


Enter your CPB Online Banking credentials and click Connect.


You may see an error, but don’t worry; this is expected if you have never set up Direct Connect before. Let’s help you fix that. Log in to your Online Banking and navigate to Profile > Connected Apps.


You’ll see QuickBooks is awaiting authorization. Click the check box and then Authorize, and you should see the application under Connected Apps. You’re ready to go.


Go back to your QuickBooks and press Connect again. It should connect to your accounts now.


It’s very important to complete this next step carefully, so you don’t get missing or duplicated transactions. After your accounts load, map each one to an existing account in your QuickBooks by using the “Select Existing or Create New” menu.

Click Connect and then Close. Congratulations, you’re all set to use Direct Connect!