User Management Help
User Management Help
User Administration - Add a user
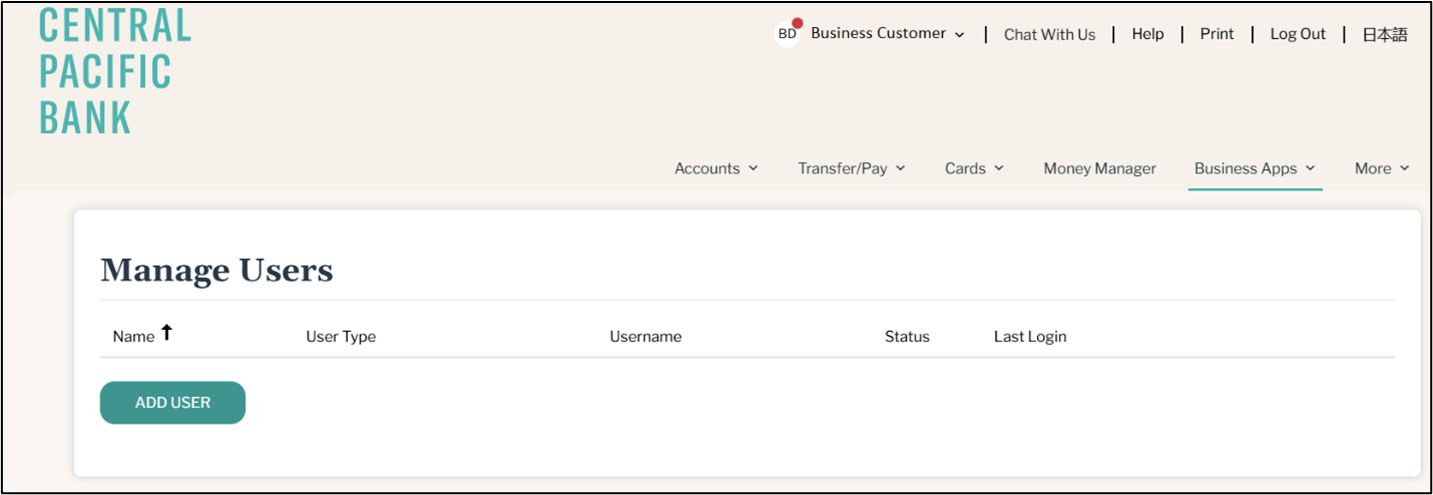
1. Navigate to Business apps > User Administration > Manage Users
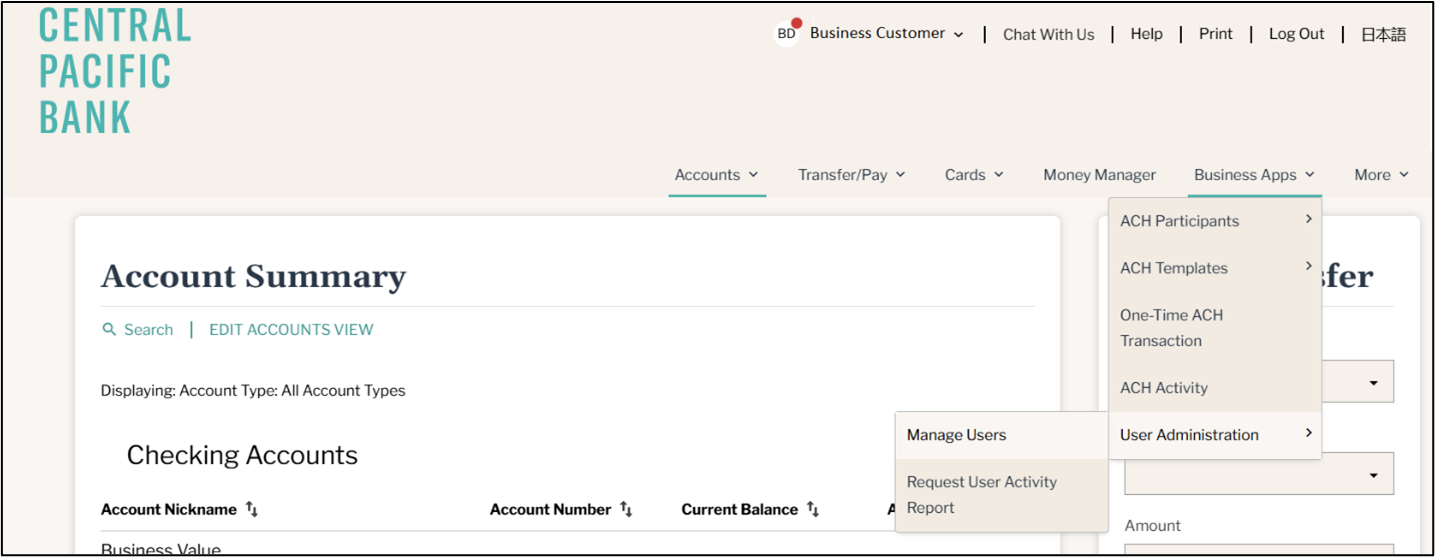
2. Add a user
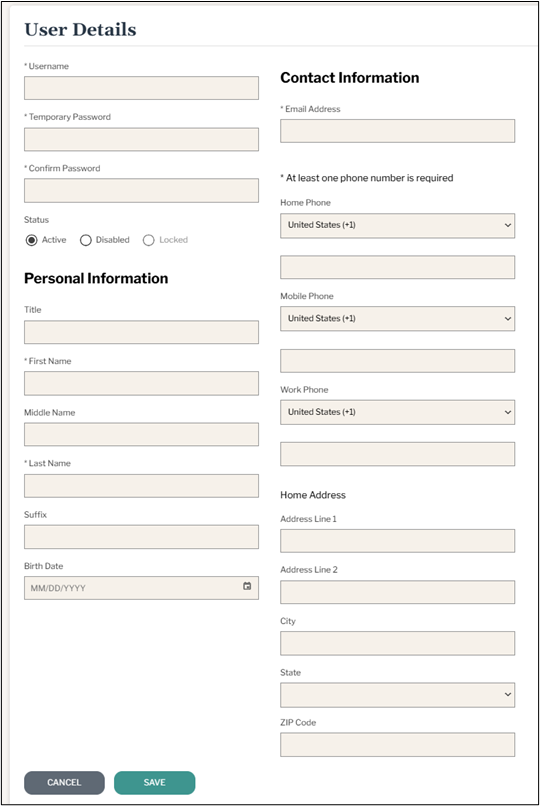
3. Enter applicable information, keeping in mind that fields with an asterisk (*) indicate required fields.
Username must be 8 to 25 characters long; special characters are allowed.
Passwords must be 8 to 32 characters long and must contain 3 out of the following: One uppercase letter, one lowercase letter, one number, and a special character (~!@#$%^&*()_+={}|:;?,./)
This user can access this account via the temporary password for 15 minutes. If the user does not log in within that time, a new password will have to be reset.
Please input at least one phone number for the new user, because the new user will need it for security purposes.
4.
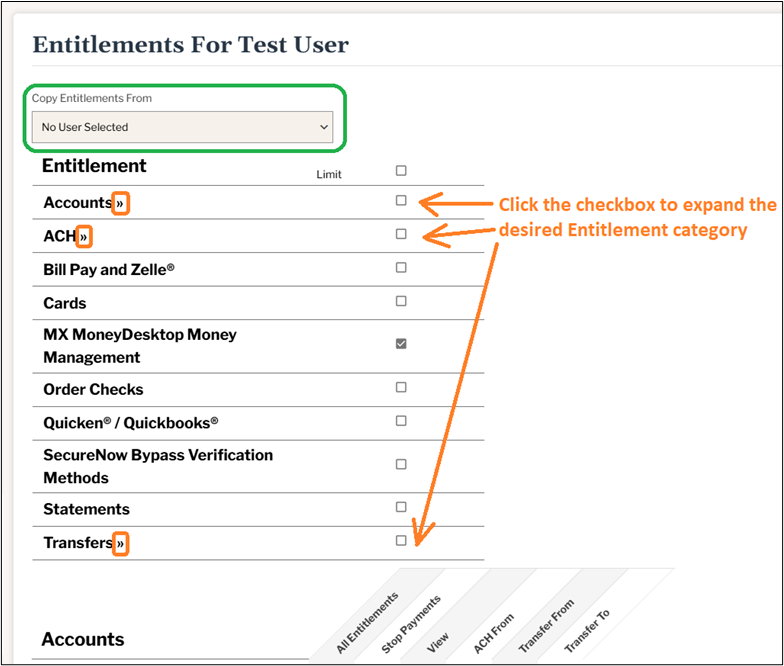
In the Entitlements screen, check off all the features and accounts that you want the user to have, then click Save (functions available will depend on your service plan).
TIPS:
- Entitlements can be copied/replicated from an existing user. (see below green-circled item)
- Please click the checkbox to expand any sections that are indicated by a >> . (see below orange-circled items)
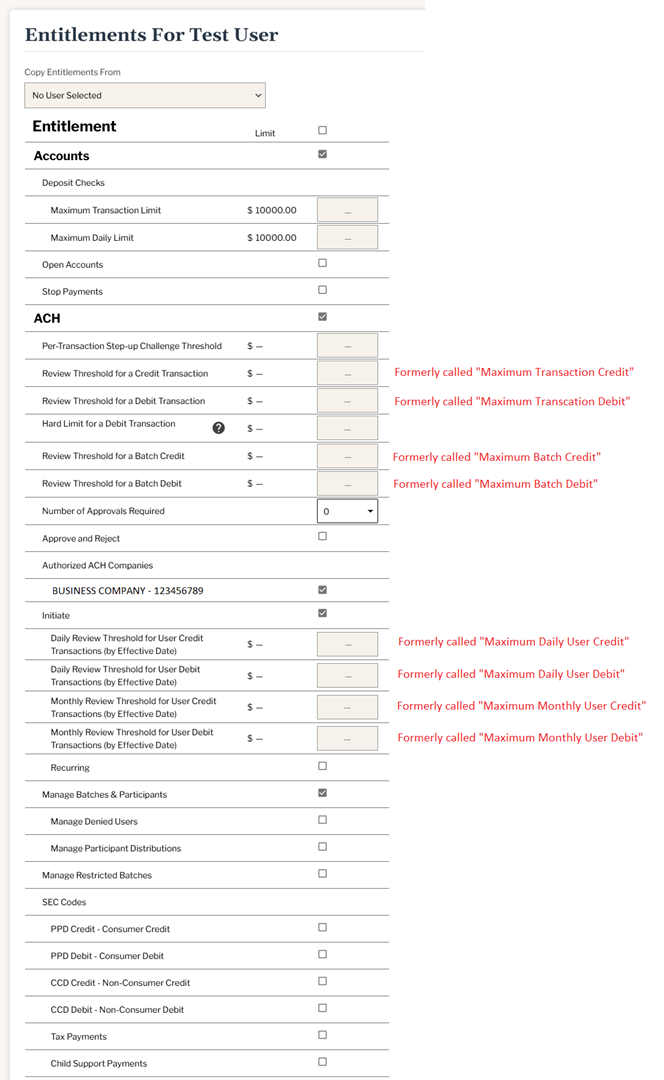
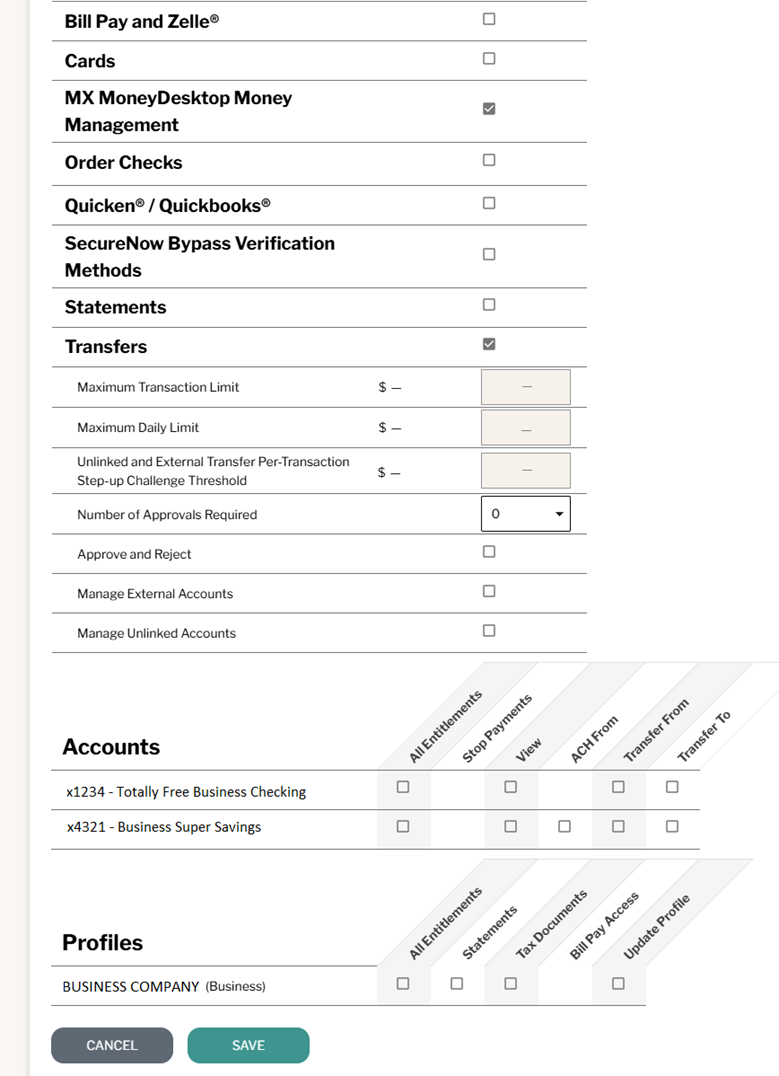
Expanded View of Entitlements (NOTE – not all entitlements may show; these are dependent on your service plan):
5. Removing a user
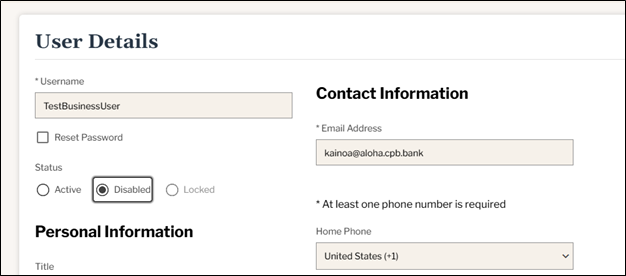
If a user needs to be removed, it’s important to mark the user as Disabled. This will ensure that any ACH batches the user might have created do not get cancelled.